minivan blackout curtains

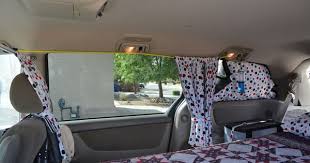
Your feed is empty! Get more inspiration every day by following your favorite channels.Customize your feed »Truck Bed CampingTruck Camping IdeasTruck Bed CamperCamping SuppliesCamping StuffCamper Shell CampingCamper DataTacoma CampingGrid CamperForwardWe did this, but used a 'Joey Bed' for underneath so you can slide everything all the way in the back to the front. It was awesome for 2 huge dogs and 2 adults all the way through Canada. Command HooksCommand StripsCommand Curtain3M Hooks15 CommandHang CurtainsPatio CurtainsSmall CurtainsCampervan CurtainsForwardCommand hooks are a super easy way to hang curtains. 37 RV Hacks That Will Make You A Happy CamperRear CurtainsFront CurtainSide CurtainsCurtains HangCurtains SiennaCurtain RodsVolvo CampingMinivan GlampingCar CampingForwardSide curtains hang on bungee cords strung between hand holds. Front curtain is on a spring rod that fits into holes already in the minivan. I just removed the oval covers and found readymade curtain rod holders.

It seemed logical that curtains would be the way to go.
target tan henna curtainsWe found that Honda makes privacy curtains specifically for the Element, however, the pricetag was over $100.
hemp shower curtains vancouverThis was much more than we were interested in spending for this particular project. We continued to search online and came across a post about this very topic in the Element Owners Club forum. As it turned out, a cheap alternative to curtains was to make panels out of Reflectix. That became the solution to our problem. We made a set of inserts and they worked great. They were cheap and relatively easy to make. Start by purchasing a roll of Reflectix (which is essentially bubble wrap covered in a sheet of some kind of silver paper). Plan on paying about $20-$30 (although I have seen smaller rolls for cheaper).

You should be able to find this at most hardware stores. Next take measurements of the windows in the vehicle from the inside. Do not worry about slants and curves for now. Measure the longest length and width for each window. Add at least an extra inch to each measurement just to make sure you do not measure short. Another reason for doing this, is that in some cases after continued use, the panels have shrunk a little. Transfer those measurements onto the roll of Reflectix and cut out the rectangle. Take the rectangle of Reflectix back to the car and place it over the window you are working on. Push the edges of the Reflectix into ledges of the window. For the corners that have a slant or curve, use the Sharpie to mark where you need to cut. Trim it where you made your marks. For the side windows take the panel you just made and use it as a stencil to make a duplicate for the window on the other side. Once all panels are cut and trimmed, it is time to put them all in.

Line up the Reflectix insert with the window and then tuck the edges into the ledges that border the window. It should stay nice and firm. If, for some reason it still seems too big, feel free to trim it further until it fits. Just make sure you do not trim it too short otherwise you will need to start over. It is difficult to cut the perfect shape, but don’t worry too much about that because usually you can just tuck in the extra material. To store your panels while they are not in use, take all the panels and lay them in a pile. Then roll them up like a sleeping bag and secure the roll with a strap or bungee cord. If done correctly, you should be able to block out just about all light that would come into the vehicle. This makes your vehicle private and cozy. One thing I should add though, if your windows are shut while you are sleeping in the vehicle, don’t be surprised to see an accumulation of water on the windows in the morning. It is just trapped condensation and it will go away after a few minutes of running your defroster.
For our first time camping in a vehicle, the Reflectix inserts worked great. There were a couple of corners that we cut short that let in a slit of light, but it wasn’t enough to bother us. Overall, this was an effective and inexpensive project and we were glad we used the inserts rather than paying the extra for the privacy curtains.It's much easier to go stealth camping in a low-profile minivan. A camper inside a Honda Odyssey minivan has some distinct advantages to its behemoth RV cousins: (1) manageable gas mileage, and (2) a stealth that allows you to camp almost anywhere. With a few relatively simple adjustments, you'll be able to take care of almost all your basic needs within the confines of your Honda van. You'll need the most basic of building skills to get the job done and be on your way to your first camping adventure. Remove the seats from the rear of your minivan by removing the bolts that secure the seats and hardware to the chassis of the van. Remove all hardware so no parts are sticking up from the floor of the van.

If you're not sure what to expect when you remove the seats, consult the owner's manual that came with your Honda van. Also remove the carpeting or upholstery on the floor of the van. Measure the back dimensions of your van and make a plan for the construction. A piece of graph paper can come in handy to help you design a camper van that maximizes your available space. Typically, van campers feature a bed in back with storage space underneath, often with a futon-style folding couch bed. In the middle area, you'll often find a basic kitchen and a fold-down table, with various cabinets for storage tucked wherever they can fit. Get some ideas by checking out the layout of other van campers on sites like Cheap RV Living or Camper Van Life. You can even find ready-made plans to help you get ideas. Once you have a plan for the camper, figure out how much each component costs. Don't forget to check RV scrap yards and rebuilding centers to find the best deals possible. Purchase your materials when you've determined how much you have to spend and what is available.

Carpet with padding is the easiest to install, but if you want something more stain-proof, consider installing a sheet of plywood as a subfloor, and then placing stick-on vinyl, wood or bamboo tiles over top. The traditional van layout either has a factory-made seat that folds down into a bed, but depending on your budget, you may opt to build a simple plywood platform with room for storage underneath. For that method, people often place a futon or air bed mattress over the top, with bedding laid over the top. Build and install your kitchen compartment. Depending on your skills and budget, you could build a simple box kitchen with a hand-pump sink on one side and a basic camping stove and cooler on the other -- just make sure you properly vent the van when cooking with gas. You could also purchase a kitchen compartment from a van conversion company, which will spend time creating locking cabinets, a custom-fit stove and an RV-style icebox or fridge. In most small van conversions, kitchens are placed along the wall behind the driver's seat.