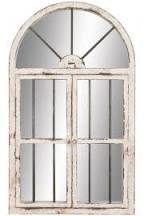
harrison grommet top curtain panel

Valance LearnHow To Make A Valance Curtain DiyDiy Valance No SewSewing ValanceKids ValanceValance TutorialCurtains ValanceValance IdeasValances For WindowsForwardLearn how to make a no sew valance that has pleats at the corners and an accent band at the bottom. This simple design will go with many décor styles. New School in Northwest Omaha? Recommendation for compounding pharmacy Stainless Kenmore Elite glass top convection range for sale Iso bible study group (I can't do Thursdays) Daycare Preschool and Toddler Blue Cots Where to donate kids books? $15 Coupon for custom made fabric art and advice, classifieds, important alerts, and much more on Nextdoor. Nextdoor members in share concerts, street fairs, garage sales, community meetings, and more. New OPS Elementary School Heartland German Shepherd Rescue (HUGS) 1st Annual Gala Time to love yourself Valentine's Day Supper w/live music!! Oh, to be a kid! Kids And Teenage Rooms

A great colour palette that is warm, inviting and comforting. Grey and yellow are the ideal colour combination. « Back to Window Treatments Home Page > Paisley Floral Patchwork Furniture Cover Paisley Floral Patchwork Furniture Cover Paisley Patch Furniture Cover Protect your furniture from wear and tear, pet hair, spills and stains with these attractive, quilted furniture covers. Available for chairs, loveseats, sofas and recliners, each features elegant patchwork floral patterns. Sizes available for a Sofa (68"W seat width, 21"L arm flap, 39"H back flap) Loveseat (46"W seat width, 21"L arm flap, 39"H back flap) Recliner (23"W seat width, 21"L arm flap, 47"H back flap) and Chair (23"W seat width, 21"L arm flap, 39" back flap) I have been looking for something to cover my husband's "favorite" chair. I would love to toss it but he won't hear of it! So this cover makes it fit my décor and covers any stains. I washed it before putting it on the chair and it has a soft feel, not cheap or gaudy.
I would highly recommend this for covering a worn looking piece of furniture! Use on couch - You can Make the recliner cover fit and i We have a big Recliner so I read all reviews and knew how to make adjustments and it was easy to have the right Size chair cover.
curtain pole finials john lewisI bought 2 recliner covers, Made the back longer and attached wide matching color elastic to fit around back of chair and did the same to the foot rest .
sheikh jee curtains lahoreMy Husband loves it.
the tortilla curtain racismAfter friends saw what I had done they are going to do the same as it is hard to find the perfect size you need.
julian foye curtains
This was easy to do and I would do it again. It is better than expected Looks great in the bedroom. I covered up a comfortable old chair and it looks like a new oiece of furniture.
target tan henna curtainsJust hard to stay put with short tuck-in flaps.
curtains hempstead turnpike Hard to keep in place due to short tuck-in tabs.
montgomery curtains voucher codeLove the fabric and color design. I would ourchase again - oh yea, I did! This cover saved me from replacing a good sofa that has a dirty cover. Bought for motor home couch and it looks and fits beautifully - Bought for motor home - This couch cover was purchased for an older couch that needed a facelift. It was perfect, easy to clean, and it fits my large couch perfectly.

Protects new recliner and looks good - Jon the Retired Eccentric, Ordered the patched paisley furniture cover and got raves from friends. Will recommend to them to order stuff from Collections - Great product except as soon as I sit, it slides down. It needs to be a little longer. It fits great width wise. I haven't washed it yet, as I've only had it for a few days, so I can't say how it'll hold up, but it is well sewn. I need to figure out a way to prevent back from continuously falling down behind sitter. I do not want to attach with pins (etc.) as it is a leather chair. I love the look of the covers, but they really need straps or something to hold them in place. loved the color and style but dose not fit my couch should be longer - dissappointed in quality & design. I have been a Collection's customer for many years and have always liked the product. However, this is the first purchase that I was very unhappy with. The design/fit on the furniture is not secured and very flimsy.

I would NOT recommend this to anyone, unless they were looking for a dog crate cover. Would not buy again.doesn't stay securely on furniture - Goes on easy enough but doesn't stay on. Doesn't cover the whole thing. Total Items in Shopping Cart: Popular items for steamer trunkA talented seamstress with a mission, Renske Solkesz decided to create her own wardrobe after finding herself frustrated with high fashion prices. When we saw her chic and modern wardrobe creations, we asked if she’d be willing to create and share a fun accessory tutorial with us. I’m super excited about what she’s come up with: an amazing self-closing utilitarian tote! I’m a huge fan of the graphic contrast and the leather and rivet details. Like her fashion designs, this tote is made from inexpensive materials, yet looks totally luxe. I’m halfway out the door to the fabric store already! You can see the other pieces she’s created on her blog, The Dress is Made. Thanks for sharing, Renske!
CLICK HERE for the full how-to after the jump! When I designed this bag, I wanted to integrate the grip/straps in a more functional way with the rest of the bag. I experimented with different methods of holding and closing the bag, which resulted in a bag that closes automatically when you pick it up. I just created a clever way to connect the leather strap to the bag. A friend of mine called it a “yin yang bag,” which is pretty accurate, I think. The graphic use of white and dark brown fabric is not only an aesthetic choice; the dark-colored bottom makes stains less visible. 1. First, cut two large pieces of fabric according to the pattern. 2. Pin the small piece of dark fabric to the white canvas. Make sure it’s exactly in the middle, because this will form the dark bottom once the bag is finished. I used the iron to create a sharp straight fold in the edge of the brown fabric before pinning it to the white fabric. 4. Fold the lining (the large piece of dark brown fabric) in two and stitch the side edges together.

Don’t forget to leave a small part somewhere halfway unstitched. You will need this hole later on. 5. You now have a very flat bag. To create volume, you need to give the bag sides by stitching the lower corners together. To do this, open the bag and place the two side seams on top of each other. You will create a triangular fold, with the two corners now forming two triangles on top of each other. 6. Mark where you want the seams with the chalk and stitch each corner. 7. Repeat these steps with the white fabric. Make sure to turn the pretty side (the one that will become the outside) inside. When the bag is finished, all seams will be invisible between the lining and the outside. That’s the point of using a lining, apart from the pretty contrast when the bag is finished. 8. Put the lining inside the outer fabric. Make sure that the good sides, the ones that will eventually be visible, are positioned against each other. I kept the white canvas just as I had when sewing it and turned the brown lining inside-out before putting it in the white part.

If you did it right, you will see the seems of the white canvas on the outside. The brown lining is inside it, with the seams visible when you look into the bag. 9. Stitch the edges together around the bag. 10. Now the really fun part: Pull out the lining and look for the hole you left open in one of the side seams. Through this hole you can pull the whole bag inside out until it is completely reversed and all of the seems have become invisible. Use the iron again to flatten the edges and the side seams. The sewing part is done! 11. The last step is to add the eyelets and connect the strap to the bag. Eyelets and rivets usually come with some tools to make the right holes in the fabric and to keep their form when hammering them into place. Add one eyelet to either side of the bag, in the middle of each flap. 12. Stick the leather strap through one of the eyelets and connect it with two rivets to the opposing side of the bag. Do the same with the other end of the strap.